These are screenshots from the introduction to Rigging in Maya tutorials. Videos will be up soon since I finished the tutorials before knowing I had to videos, so I'll have to go back and record those.
This is parenting objects. I've done this before in other contexts, so it's pretty simple.
Here is modifying the pivot of the object. I do this all the time to change where the pivot snaps to, so I've done this before as well.
This is creating my first joints, something I have never done. It seems simple though, just click and drag and it creates joints, similar to where curve points would be on a spline.
This is the "Joint Attributes" lesson, and in this one it just goes over various joint options, such as the orientation and angles and such.
This is the next lesson, which goes over disconnecting joints. Useful for if you need to disconnect a joint, it's pretty simple.
This is going over how to remove a joint "non-destructively" as the lesson title says. It's useful for removing joints without messing up your chain. All you have to do is go to Skeleton>remove joint.
This lesson goes over the differences between the single chain solver and the rotate plane solver.
This is from the lesson over rigging with the spline IK solver. It's useful for things like tails or grappling hooks, and it seems to work kind of like soft-selection does, but with joints.
This lesson is over controlling spline IK systems. It involves adding clusters to move the joints around.
This lesson shows how to add animator-friendly controls. In this lesson, I used nurbs circles to create easy to see and manipulate controls for the grappling hook.
This lesson just goes over groups and how to use them to make your setup cleaner and more user-friendly.
This lesson goes over IK and FK blending, and adding a custom control to toggle IKFK on and off.
This lesson explains and details the node editor and how it works in Maya.
This lesson goes over driven key relationships and how to set them. Driven keys allow you to create sort of keys for animating where, if you move a part of it, the rest will follow it. For example, in the picture above, I can slide the hook along the spline in an arc, but if I make it a flat horizontal line, it will slide along that as well.
This lesson goes over the aim constraint, and how locators work. I've used these before in Principles of Animation when I animated my character's eyes.
This lesson goes over rotation order and the hierarchy of how they rotate. I had no idea that this even existed before this lesson, I always assumed that stuff just rotated. This details "gimball lock" where you lose control of an axis when you rotate something a certain way. It can cause strange animations and weird wobbles.
This is Maya's lattice deformer, something I am familiar with. This lesson uses it as a way to have the shark appear to ark through the air. I have used it on curtains, where I made a lattice cage so I could have easy to edit points to pinch or flay out the curtain.
This lesson goes over smooth binding. It covers the smooth bind options and how they work.
This is the lesson on editing smooth skin deformations. This picture is from the "paint skin weights" tool part where you can actually paint weights into the skin so it will deform differently.
This lesson covers mirroring weights, which is useful if you have a symmetrical model. This allows you to not have to do the same work twice!
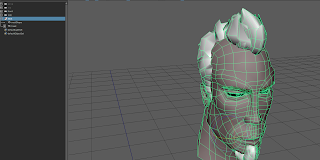
This is the lesson over Maya's "blend shape deformer" which allows you to create expressions and slide between them, then edit the face and have everything else follow it.
This lesson goes over rearranging an object's input order, which is changing the order of input operations for the model.
The final lesson goes over customizing maya. I know a little about customizing shelves in maya and stuff, but in this tutorial, he details adding custom scripted commands and changing their icon properties and even editing the marking menu (which I don't really use much.)


No comments:
Post a Comment